We don’t like the related posts plugin, per se, mainly because you can’t control what’s in it. We’d much rather you drive traffic to posts that you want the audience to read. Sales pages, highest paying Adsense pages, ebooks, top posts. . . the things that make a difference for your business.
So we’re giving you a piece of code you can copy and paste at the bottom of your blog posts to make this happen. This particular code doesn’t have words or captions. So you’d use this with Pinterest like pins that speak for themselves.
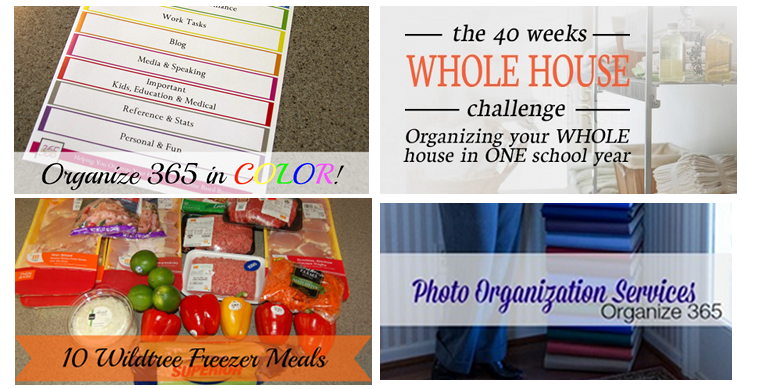
Here’s an example from Lisa Woodruff’s site: Organize365.com. In this example I took the images that were already on her pages and cropped them to fit this “matrix”:

Here’s what that code looks like:
<tr>
<td><a href=”https://organize365.com/color-coded/”><img src=”https://organize365.com/images/color.png”><td>
<td><a href=”https://organize365.com/house-organized”><img src=”https://organize365.com/images/house.png”><td></tr>
<tr>
<td><a href=”https://organize365.com/wildtree”><img src=”https://organize365.com/images/wildtree.png”><td>
<td><a href=”https://organize365.com/photos”><img src=”https://organize365.com/images/photos.png”><td></tr></table>
Now let’s break that down into the parts so you can see how you’re supposed to manipulate it for you:
Table Code Explanation
Tables start with <table> so browsers know there is a table coming. And it has to end with </table> so they know that it ended, too.
Then there are two main parts:
<tr> = “the row” . . all things after <tr> are in the same row of the table until you end the row with</tr>
<td> = “think down” . . . that’s the only way I can remember that. It’s the column in the row. And columns go down.
If you want a related post area below your post to be one row of three pictures, you’d start it with <tr> because it is a row, then you’d have to 3 <td>’s. That would look like this:
<table><tr>
<td></td>
</tr></table>
Adding Links and Images
<td> <a href=”LINK TO PAGE”><img src=”URL OF IMAGE”></a> </td>
</tr></table>
Adding Dimensions
OPTION 1. ADDING WIDTH PARAMETERS TO THE TABLE
<td> <a href=”LINK TO PAGE”><img src=”URL OF IMAGE”></a> </td>
</tr></table>
OPTION 3. ADDING WIDTH PARAMETERS TO THE IMAGES
<td> <a href=”LINK TO PAGE”><img src=”URL OF IMAGE” width=”300″></a> </td>
</tr></table>
Here’s the code
<tr>
<td><a href=”https://organize365.com/color-coded/”><img src=”https://organize365.com/images/color.png”><td>
<td><a href=”https://organize365.com/house-organized”><img src=”https://organize365.com/images/house.png”><td></tr>
<tr>
<td><a href=”https://organize365.com/wildtree”><img src=”https://organize365.com/images/wildtree.png”><td>
<td><a href=”https://organize365.com/photos”><img src=”https://organize365.com/images/photos.png”><td></tr></table>
